
DBlog建站之Websocket的使用
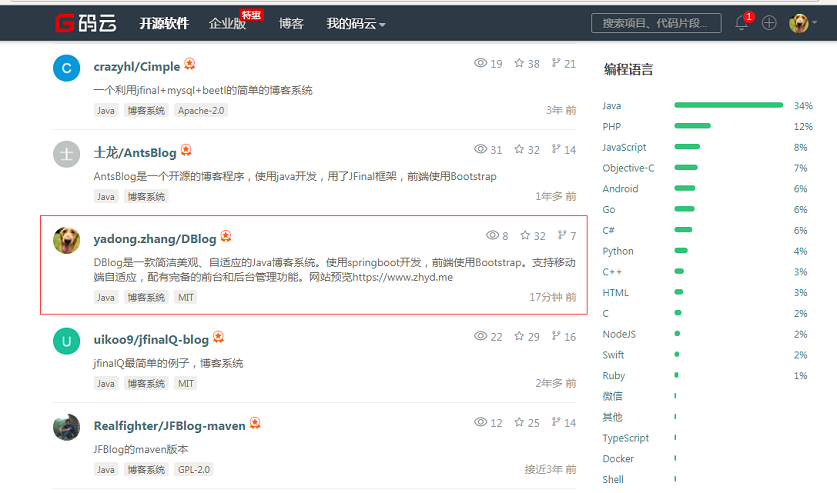
DBlog 是一款简洁美观、自适应的Java博客系统。使用springboot开发,前端使用Bootstrap。支持移动端自适应,配有完备的前台和后台管理功能。


WebSocket协议是基于TCP的一种新的网络协议。它实现了浏览器与服务器全双工(full-duplex)通信——允许服务器主动发送信息给客户端。该技术的目标是为基于浏览器的、需要和服务器进行双向通信的(服务器不能依赖于打开多个HTTP连接(例如,使用XMLHttpRequest或iframe和长轮询))应用程序提供一种通信机制。
-- 以上节选自《百度百科》 --
WebSocket (WS)是HTML5一种新的协议。它实现了浏览器与服务器全双工通信,能更好地节省服务器资源和带宽并达到实时通讯。WebSocket建立在TCP之上,同HTTP一样通过TCP来传输数据,但是它和HTTP最大不同是:
WebSocket是一种双向通信协议,在建立连接后,WebSocket服务器和Browser/Client Agent都能主动的向对方发送或接收数据,就像Socket一样;WebSocket需要类似TCP的客户端和服务器端通过握手连接,连接成功后才能相互通信。
WSS(Web Socket Secure)是WebSocket的加密版本。
-- 以上节选自《阿里云文档》 --
依据这一原则,我们可以扩展出很多功能,比如:博客在线用户统计、管理员向用户端实时推送消息通知等,本文就针对这两种情况,依照DBlog开源博客的代码,说明下其具体用法。
一、在线用户统计
业务流程:用户访问 --> 链接websocket --> 用户计数+1
编写websocket服务端
首先,编写websocket服务端。
添加pom依赖
<dependency>
    <groupId>org.springframework.boot</groupId>
    <artifactId>spring-boot-starter-websocket</artifactId>
</dependency>
添加WebSocketConfig.java
import org.springframework.context.annotation.Bean;
import org.springframework.context.annotation.Configuration;
import org.springframework.web.socket.server.standard.ServerEndpointExporter;

/**
 * websocket配置类
 *
 * @author yadong.zhang (yadong.zhang0415(a)gmail.com)
 * @version 1.0
 * @website https://www.zhyd.me
 * @date 2018/4/18 11:48
 * @since 1.0
 */
@Configuration
public class WebSocketConfig {

    /**
     * ServerEndpointExporter会自动注册使用了@ServerEndpoint注解声明的Websocket endpoint
     * @return
     */
    @Bean
    public ServerEndpointExporter serverEndpointExporter() {
        return new ServerEndpointExporter();
    }

}
添加WebsocketServer
import lombok.extern.slf4j.Slf4j;
import org.springframework.stereotype.Component;

import javax.websocket.OnClose;
import javax.websocket.OnMessage;
import javax.websocket.OnOpen;
import javax.websocket.Session;
import javax.websocket.server.ServerEndpoint;
import java.util.concurrent.CopyOnWriteArraySet;
import java.util.concurrent.atomic.AtomicInteger;

/**
 * @author yadong.zhang (yadong.zhang0415(a)gmail.com)
 * @version 1.0
 * @website https://www.zhyd.me
 * @date 2018/4/18 11:48
 * @since 1.0
 */
@Slf4j
@ServerEndpoint(value = "/websocket")
@Component
public class ZydWebSocket {

    /**
     * 初始在线人数
     */
    private static AtomicInteger onlineCount = new AtomicInteger(0);
    /**
     * 线程安全的socket集合
     */
    private static CopyOnWriteArraySet<Session> webSocketSet = new CopyOnWriteArraySet<>();

    /**
     * 连接建立成功调用的方法
     */
    @OnOpen
    public void onOpen(Session session) {
        webSocketSet.add(session);
        onlineCount.incrementAndGet();
        log.info("有链接加入,当前在线人数为: {}", getOnlineCount());
        WebSocketUtil.broadcast(getOnlineCount(), webSocketSet);
    }

    /**
     * 连接关闭调用的方法
     */
    @OnClose
    public void onClose() {
        onlineCount.decrementAndGet();
        log.info("有链接关闭,当前在线人数为: {}", getOnlineCount());
        WebSocketUtil.broadcast(getOnlineCount(), webSocketSet);
    }

    /**
     * 收到客户端消息后调用的方法
     *
     * @param message
     *         客户端发送过来的消息
     */
    @OnMessage
    public void onMessage(String message, Session session) {
        log.info("{}来自客户端的消息:{}", session.getId(), message);
        WebSocketUtil.sendMessage(message, session);
    }

    private String getOnlineCount() {
        return Integer.toString(onlineCount.get());
    }
WebSocketUtil工具类
import lombok.extern.slf4j.Slf4j;

import javax.websocket.Session;
import java.io.IOException;
import java.util.Set;

/**
 * websocket工具类,支持单条发送和批量发送
 *
 * @author yadong.zhang (yadong.zhang0415(a)gmail.com)
 * @version 1.0
 * @website https://www.zhyd.me
 * @date 2018/4/18 11:48
 * @since 1.0
 */
@Slf4j
public class WebSocketUtil {

    private WebSocketUtil() {
        // 私有化构造方法,禁止new
    }

    /**
     * 向客户端发送消息
     *
     * @param message
     *         消息内容
     * @param session
     *         客户端session
     * @throws IOException
     */
    public static void sendMessage(String message, Session session) {
        try {
            session.getAsyncRemote().sendText(message);
        } catch (Exception e) {
            log.error("websocket-->向客户端发送数据发生异常", e);
        }
    }

    /**
     * 群发
     *
     * @param message
     *         消息内容
     * @param sessionSet
     *         客户端session列表
     * @throws IOException
     */
    public static void broadcast(String message, Set<Session> sessionSet) {
        // 多线程群发
        for (Session entry : sessionSet) {
            if (entry.isOpen()) {
                sendMessage(message, entry);
            } else {
                sessionSet.remove(entry);
            }
        }
    }
}
编写Js代码
(function ($) {
    $.extend({
        websocket: {
            _this: null,
            _initialized: false,
            init: function (options) {
                if (!this.isSupported()) {
                    // console.error('Not support websocket');
                    return;
                }
                var op = $.extend({
                    callback: function () {
                    },
                    host: null,
                    reconnect: false
                }, options);
                if (!op.host) {
                    // console.error("初始化WebSocket失败,无效的请求地址");
                    return;
                }
                try {
                    this._this = new WebSocket(op.host);
                } catch (error) {
                    return;
                }
                this._initialized = true;
                //连接发生错误的回调方法
                this._this.onerror = function () {
                    // console.log("与服务器连接失败...");
                };

                //连接成功建立的回调方法
                this._this.onopen = function (event) {
                    // console.log("与服务器连接成功...");
                };

                //接收到消息的回调方法
                this._this.onmessage = function (event) {
                    // dwz.notification.show({notification: event.data});
                    op.callback(event.data);
                    // console.log("接收到服务器端推送的消息:" + event.data);
                };

                //连接关闭的回调方法
                this._this.onclose = function () {
                    $.websocket._initialized = false;
                    // console.log("已关闭当前链接");
                    if (op.reconnect) {
                        // 自动重连
                        setTimeout(function () {
                            $.websocket.open(op);
                        }, 5000);
                    }
                }
            },
            open: function (options) {
                var op = $.extend({
                    callback: function () {
                    },
                    host: null,
                    reconnect: false
                }, options);

                if (this._initialized) {
                    this.close();
                }
                this.init(options);
                //监听窗口关闭事件,当窗口关闭时,主动去关闭websocket连接,防止连接还没断开就关闭窗口,server端会抛异常。
                window.onbeforeunload = function () {
                    // console.log("窗口关闭了");
                    $.websocket.close();
                }
            },
            isSupported: function () {
                return 'WebSocket' in window;
            },
            send: function (message) {
                if (!this._this) {
                    return;
                }
                this._this.send(message);
            },
            close: function () {
                if (!this._this) {
                    return;
                }
                this._this.close();
            }
        }
    });
})(jQuery);
使用方式:
$.websocket.open({
    host: "ws://" + host + "/websocket",
    reconnect: true,
    callback: function (json) {
        $(".online").html(json);
    }
});
测试效果
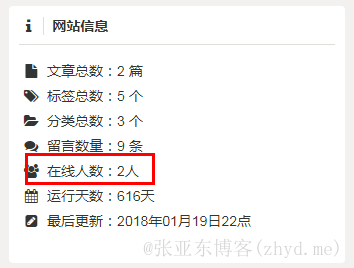
java端日志
2018-07-05 10:20:19 [com.zyd.blog.core.websocket.ZydWebSocket:61] INFO  - 有链接加入,当前在线人数为: 1
2018-07-05 10:20:30 [com.zyd.blog.core.websocket.ZydWebSocket:61] INFO  - 有链接加入,当前在线人数为: 2
2018-07-05 10:22:03 [com.zyd.blog.core.websocket.ZydWebSocket:71] INFO  - 有链接关闭,当前在线人数为: 1
2018-07-05 10:22:03 [com.zyd.blog.business.aspect.RedisCacheAspect:73] INFO  - biz_cache_com_zyd_blog_business_service_impl_SysLinkServiceImpl_listOfIndex()从缓存中获取数据
2018-07-05 10:22:03 [com.zyd.blog.business.aspect.RedisCacheAspect:73] INFO  - biz_cache_com_zyd_blog_business_service_impl_SysConfigServiceImpl_get()从缓存中获取数据
2018-07-05 10:22:03 [com.zyd.blog.core.aspects.RenderAspects:47] INFO  - config表未更新
2018-07-05 10:22:03 [com.zyd.blog.business.aspect.RedisCacheAspect:73] INFO  - biz_cache_com_zyd_blog_business_service_impl_BizTagsServiceImpl_listAll()从缓存中获取数据
2018-07-05 10:22:03 [com.zyd.blog.business.aspect.RedisCacheAspect:73] INFO  - biz_cache_com_zyd_blog_business_service_impl_BizCommentServiceImpl_listRecentComment(10)从缓存中获取数据
2018-07-05 10:22:04 [com.zyd.blog.core.websocket.ZydWebSocket:61] INFO  - 有链接加入,当前在线人数为: 2
二、实时推送消息通知
改造服务端代码
改造ZydWebsocketServer,实现按消息类型发送通知
public class ZydWebsocketServer {

 /**
  * 线程安全的socket集合
  */
 private static CopyOnWriteArraySet<Session> webSocketSet = new CopyOnWriteArraySet<>();
 /**
  * 初始在线人数
  */
 private static AtomicInteger onlineCount = new AtomicInteger(0);

 /**
  * 连接建立成功调用的方法
  */
 @OnOpen
 public void onOpen(Session session) {
     webSocketSet.add(session);
     int count = onlineCount.incrementAndGet();
     log.info("有链接加入,当前在线人数为: {}", count);

     WebSocketUtil.sendOnlineMsg(Integer.toString(count), webSocketSet);
 }

 /**
  * 连接关闭调用的方法
  */
 @OnClose
 public void onClose() {
     int count = onlineCount.decrementAndGet();
     log.info("有链接关闭,当前在线人数为: {}", count);
     WebSocketUtil.sendOnlineMsg(Integer.toString(count), webSocketSet);
 }

 /**
  * 收到客户端消息后调用的方法
  *
  * @param message
  *         客户端发送过来的消息
  */
 @OnMessage
 public void onMessage(String message, Session session) {
     log.info("{}来自客户端的消息:{}", session.getId(), message);
 }

 /**
  * 获取在线用户数量
  *
  * @return
  */
 public int getOnlineUserCount() {
     return onlineCount.get();
 }

 /**
  * 获取在线用户的会话信息
  *
  * @return
  */
 public CopyOnWriteArraySet<Session> getOnlineUsers() {
     return webSocketSet;
 }
}
改造WebSocketUtil
public class WebSocketUtil {

    private static final String ONLINE_MSG_KEY = "online";
    private static final String NOTIFICATION_MSG_KEY = "notification";

    private WebSocketUtil() {
        // 私有化构造方法,禁止new
    }

    /**
     * 根据消息类型,生成发送到客户端的最终消息内容
     *
     * @param type
     *         消息类型
     * @param content
     *         消息正文
     * @return
     */
    private static String generateMsg(String type, String content) {
        return String.format("{\"fun\": \"%s\", \"msg\":\"%s\"}", type, content);
    }

    /**
     * 发送在线用户的消息
     *
     * @param msg
     * @param sessionSet
     */
    public static void sendOnlineMsg(String msg, Set<Session> sessionSet) {
        broadcast(generateMsg(ONLINE_MSG_KEY, msg), sessionSet);
    }

    /**
     * 发送通知的消息
     *
     * @param msg
     * @param sessionSet
     */
    public static void sendNotificationMsg(String msg, Set<Session> sessionSet) {
        broadcast(generateMsg(NOTIFICATION_MSG_KEY, msg), sessionSet);
    }

    /**
     * 向客户端发送消息
     *
     * @param message
     *         消息内容
     * @param session
     *         客户端session
     * @throws IOException
     */
    private static void sendMessage(String message, Session session) {
        try {
            session.getAsyncRemote().sendText(message);
        } catch (Exception e) {
            log.error("websocket-->向客户端发送数据发生异常", e);
        }
    }

    /**
     * 群发
     *
     * @param message
     *         消息内容
     * @param sessionSet
     *         客户端session列表
     * @throws IOException
     */
    private static void broadcast(String message, Set<Session> sessionSet) {
        if (CollectionUtils.isEmpty(sessionSet)) {
            return;
        }
        // 多线程群发
        for (Session entry : sessionSet) {
            if (null != entry && entry.isOpen()) {
                sendMessage(message, entry);
            } else {
                sessionSet.remove(entry);
            }
        }
    }
}
新增通知插件
(function ($) {
    $.extend({
        notification: {
            isSupported: function () {
                return 'Notification' in window;
            },
            isPermissionGranted: function () {
                return Notification.permission === 'granted';
            },
            requestPermission: function () {
                //验证浏览器是否支持Notification,如果不支持打印提示信息并返回
                if (!this.isSupported()) {
                    // console.log('当前浏览器不支持Notification API');
                    return;
                }
                //该方法将会询问用户是否允许显示通知,不能由页面调用(onload),必须由用户主动事件触发(onclick等)
                //当用户同意之后,再次调用该方法则无效,即该方法仅对Notification.Permission不为'granted'的时候起作用
                Notification.requestPermission(function (status) {
                    //status是授权状态,如果用户允许显示桌面通知,则status为'granted'
                    // console.log('status: ' + status);
                    //permission只读属性:
                    //  default 用户没有接收或拒绝授权 不能显示通知
                    //  granted 用户接受授权 允许显示通知
                    //  denied  用户拒绝授权 不允许显示通知
                    var permission = Notification.permission;
                    // console.log('permission: ' + permission);
                });
            },
            show: function (options) {
                // this.requestPermission();
                if (!this.isSupported()) {
                    // console.log('当前浏览器不支持Notification API');
                    return;
                }
                if (!this.isPermissionGranted()) {
                    // console.log('当前页面未被授权使用Notification通知');
                    return;
                }
                var op = $.extend({
                    title: "您有一条新消息",
                    icon: appConfig.staticPath + '/img/notification.png',
                    delay: 5000,
                    notification: null
                }, options);

                var n = new Notification(op.title, {
                    icon: op.icon,
                    noscreen: true,
                    body: op.notification
                });
                //  用户点击之后当天不再显示
                var hide = localStorage.getItem("hide");
                if (!hide || parseInt(hide) < new Date().getDate()) {
                    n.onshow = function () {
                        setTimeout(function () {
                            n.close();
                        }, op.delay);
                    };
                }


                n.onclick = function () {
                    // 打开视图?
                    n.close();
                    //  用户点击之后当天不再显示
                    localStorage.setItem("hide", new Date().getDate());
                };

                n.onerror = function () {
                    // console.log('产生错误');
                };

                n.onclose = function () {
                    // console.log('关闭通知窗口');
                };
            }
        }
    });
})(jQuery);
改造websocket请求方法
// 申请显示通知的权限
$.notification.requestPermission();
$.websocket.open({
    host: "ws://" + host + "/websocket",
    reconnect: true,
    callback: function (result) {
        console.log(result);
        var resultJson = JSON.parse(result);
        wesocketMsgResolver[resultJson["fun"]](resultJson["msg"]);
    }
});
/**
 * websocket消息解析器
 *
 * @type {{online: wesocketMsgResolver.online}}
 */
var wesocketMsgResolver = {
    online: function (value) {
        value && $(".online").html(value);
    },
    notification: function (value) {
        value && $.notification.show({
            notification: value
        });
    }
};
添加页面、controller
页面
<form class="form-horizontal form-label-left" novalidate>
    <div class="item form-group">
        <label class="control-label col-md-3 col-sm-3 col-xs-12" for="domain">消息通知内容<span class="required">*</span></label>
        <div class="col-md-6 col-sm-6 col-xs-12">
            <textarea class="form-control col-md-7 col-xs-12" id="msg" name="msg" required="required" placeholder="请输入消息通知内容" rows="5"></textarea>
        </div>
    </div>
    <div class="item form-group">
        <label class="control-label col-md-3 col-sm-3 col-xs-12" for="comment"></label>
        <div class="col-md-6 col-sm-6 col-xs-12">
            <button type="button" class="btn btn-primary" id="saveBtn"><i class="fa fa-send"> 发送</i></button>
        </div>
    </div>
</form>
<script type="text/javascript">
    $("#saveBtn").click(function () {
        var $form = $(this).parents("form");
        var msg = $("#msg").val();
        $.post("/api/notice", {msg : msg}, function (json) {
            $.alert.ajaxSuccess(json);
        })
    });
</script>
controller
@RestController
@RequestMapping("/api")
public class RestApiController {

    @Autowired
    private ZydWebsocketServer websocketServer;


    /**
     * 发送消息通知
     *
     * @return
     */
    @RequiresPermissions("notice")
    @PostMapping("/notice")
    public ResponseVO notice(String msg) {
        WebSocketUtil.sendNotificationMsg(msg, websocketServer.getOnlineUsers());
        return ResultUtil.success("消息发送成功", articleService.listMaterial());
    }
}
测试
附
最后赠送各位几个小技巧
1.websocket默认为ws协议(http),如果网站已实现https,请使用wss协议
ws://host/websocket  -- > http
wss://host/websocket  -- > https
2.nginx中默认不支持websocket,添加如下配置
location  ^~  /websocket {
     proxy_pass http://[改为自己的host]/websocket;
     proxy_redirect off;
     proxy_set_header X-Real-IP $remote_addr;
     proxy_set_header Host $host:$server_port;
     proxy_set_header X-Forwarded-For $proxy_add_x_forwarded_for;
     # 声明支持websocket
     proxy_set_header Upgrade $http_upgrade;
     proxy_set_header Connection "Upgrade";
}
3.阿里云的CDN不支持websocket,所以,使用阿里云CDN的小伙伴如果碰到websocket不可用,不必惊慌。可以通过单起一个Websocket的程序服务提供支持,或者不用CDN(手动滑稽~~~~)
4.获取源码请点击这儿
- 本文标签: Java websocket OneBlog
- 本文链接: https://zhyd.me/article/111
- 版权声明: 本文由张亚东原创发布,转载请遵循《署名-非商业性使用-相同方式共享 4.0 国际 (CC BY-NC-SA 4.0)》许可协议授权
热门推荐


相关文章
关于我

近期评论
-
来自: JustAuth于2019年7月21日正式喜提码云【GVP 】称号

-
来自: 留言板
-
来自: 暴露真实IP真的没关系吗?

-
来自: 留言板
-
来自: 留言板